Getting Started
Assuming you already have a CMake project to configure, skip to the Configuring Your Project section.
CMake Tools’ Quick Start
CMake Tools provides a CMake: Quick Start command to quickly generate a very bare-bones CMake project that can be configured and built with minimal friction.
Start by selecting CMake: Quick Start from the command palette:

CMake Tools will then prompt you for the following information:
The project name - Will be written to the generated
CMakeLists.txtand a few initial source files.The project type - Decides what initial source files to write. Not hugely important as the project can be tweaked arbitrarily after generation. Currently offers two choices:
Library - Writes an
add_library()command and a basic source and header file.Executable - Writes an
add_executable()command and a basic source file with a Hello, world stylemain()function.
Once this information is collected, CMake will try an initial configure and build of the project straight away.
Configuring Your Project
Configuring a project is simple, but has two steps before configuration can take place.
Pre-Configure Steps
Selecting a Kit
Before we can configure, you must select a Kit. (Read more about kits).
- What are kits?
Kits represent a toolchain: A set of compilers, linkers, or other tools that will be used to build a project. If you have no Kit selected, CMake Tools will start by asking you to select a Kit.
When first opening a project, a status bar item will read No Kit Selected:
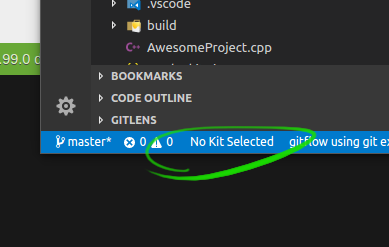
To select a kit, click this statusbar button, or run the Select a Kit command from the command palette. A quick-pick will appear:
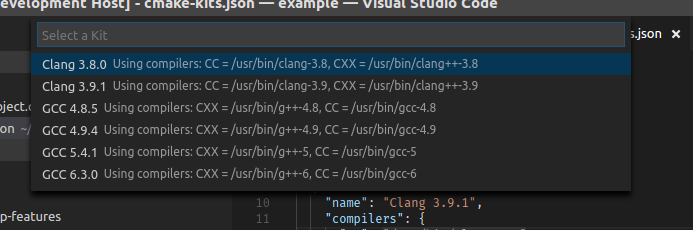
Upon choosing a kit, the statusbar button will display the name of the active kit:

The chosen kit will be remembered between sessions. Should the availability of the kit change, the statusbar item may revert and you will be required to select a kit again.
Note
If you try to configure your project without an active Kit selected, you will be prompted to choose one before configuring can proceed.
CMake Tools will use the compilers/toolchain from the kit when building your project.
Find out more on the CMake Kits page.
Selecting a Variant
Similar to selecting a kit, we must select a Variant. (Read more about variants).
Before selecting a variant, the variant slot on the statusbar will read Unknown:
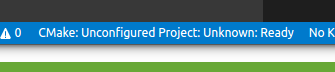
To select a variant, click this statusbar button, or run the Set build type command from the command palette. A quick-pick will appear:
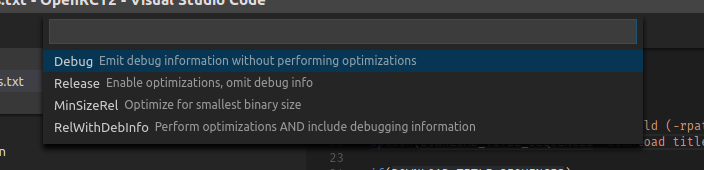
The active build variant will be displayed on the same statusbar button, along with the project name and extension status.
Note
Just like with kits, CMake Tools will ask you which variant to build if you haven’t already made a selection.
Variants can be customized to a wide variety of purposes. Find out more on the CMake Variants page.
Running Configuration
Configuration can be run by clicking the project button in the statusbar and changing the build type, by running the CMake: Configure command from the command palette, or by running a build when configuration has not yet taken place.
When configuration runs, the CMake/Build output panel will reveal and show the live output from CMake as configuration runs:
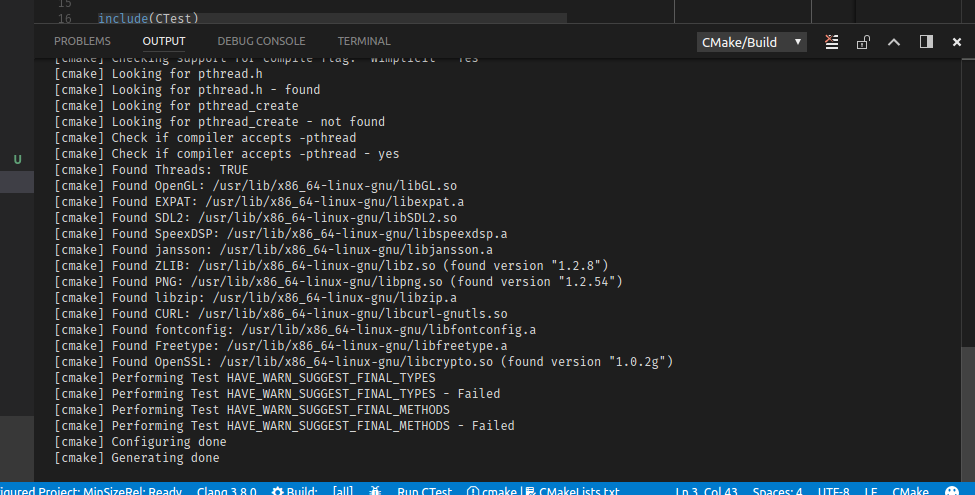
At this point, CMake Tools has loaded information about your project and you are free to roam about the cabin.
See also
Building Your Project
More important than just configuring, you probably want to build your project as well.
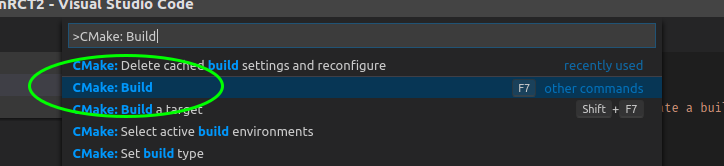
Building is simple: Run the CMake: Build command from the command palette:
Note
The default keybinding for this command is F7.
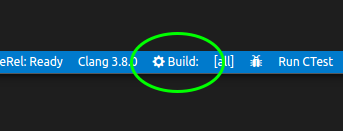
You can also press the Build button in the statusbar:
While the the build is running, the Build button will be replaced with a build progress bar:
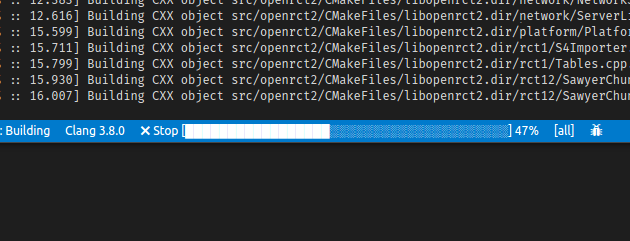
The build can be stopped by clicking the Stop button.
See also
Accessing Build Results
By default, CMake Tools writes build output to the build/ subdirectory of
your source tree, so build results are visible from the file explorer within
Visual Studio Code. This can be changed by changing the
cmake.buildDirectory setting.